I’m a nature enthusiast who adores greens and wildflowers, a devoted wife, a nurturing mother, and a dedicated lifestyle photographer. I have loved taking photos since I was little and could handle a disposable camera. I have since perfected the art of seizing bright, candid moments that encapsulate your family’s authentic connections. I believe you deserve visuals that celebrate the splendor of your daily life while you navigate the delightful chaos of parenthood.
hi, i'm jessica!
Best Time of Day to Take Photos in ANY location!
February 16, 2023
If you ask a photographer friend or check Google for the best time of day to take photos, odds are you’re going to get the generic answer of ‘Golden Hour’. There’s good reason for this but it’s not always the best answer. There are a lot of variables when it comes to choosing when the start a photo session outside and this guide will help you choose the perfect time.
What is Golden Hour?
Golden hour is the first hour after the sun rises and the last hour before the sun sets. There is very good reason why this is coveted as the best time of day to go out and start your session. The biggest reason is that the light is more diffused. Diffusion happens when light has to travel through more things or it’s bouncing off various surfaces before hitting your subject. This happens during Golden Hour because of the atmosphere the light is traveling through when the sun is low. On the opposite spectrum you have direct light which creates very harsh shadows and usually doesn’t have as soft of a look.
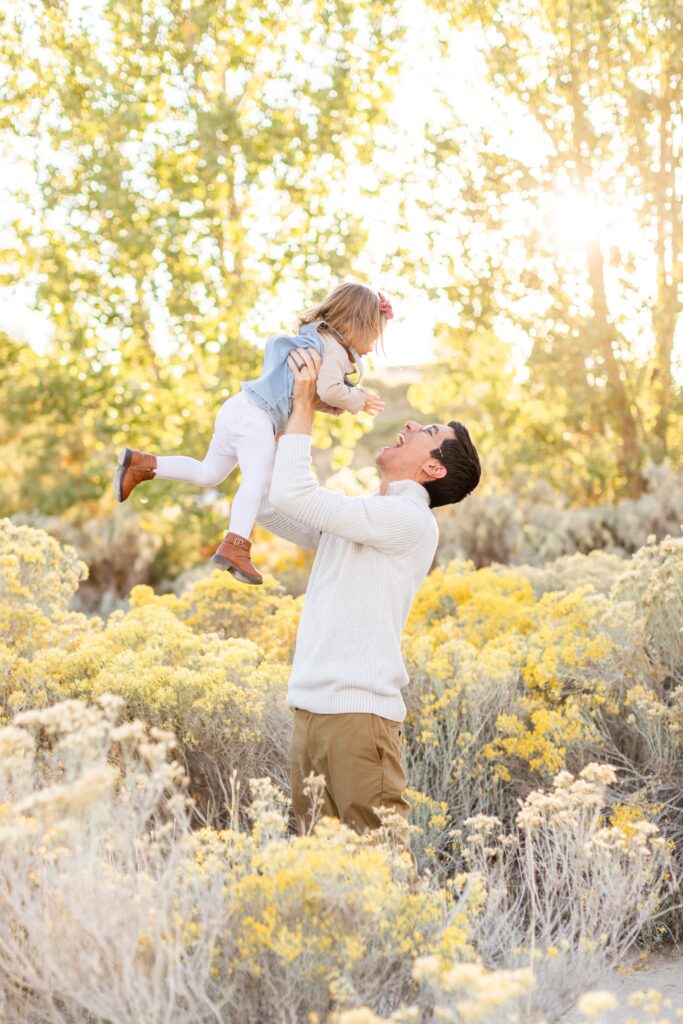
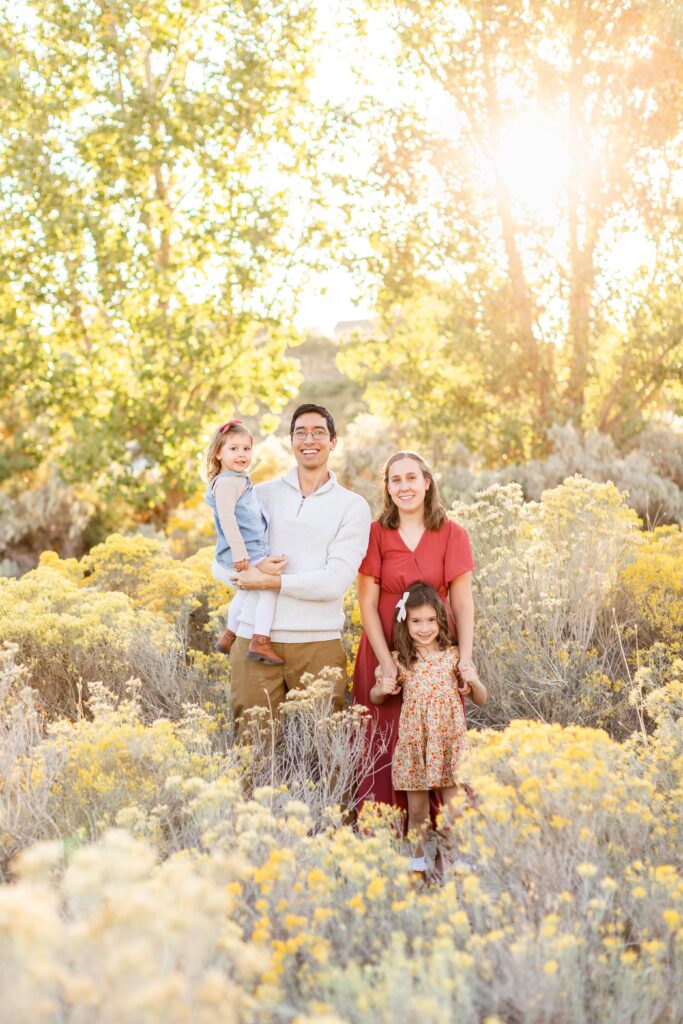
Another reason I personally love golden hour is so that I can get the sun in the picture. When the sun is high in the sky, it’s impossible to get it in the frame with your subject. During sunrise or sunset, it’s low enough that you are able to see it. Here’s an example:
Limitations to Golden Hour
When I started photographing sessions outside, I always started my shoots about 1 hour before sunset just like I was told. However, I noticed that during some of my sessions I was losing light much sooner than anticipated. I was baffled and disappointed when I got to the end of my shoot and I was scrambling to get all the photos in before the light was too low. After a lot of trial and error I realized my problem. Topography.
Why Topography Matters
Topography is the arrangement of the land. Most areas of the world are not flat, they have hills and valleys and variations in their topography. In the west of the US, for example, you’d be hard pressed to find a long stretch of land that’s completely flat. I live in Utah and there are hills and mountains all over.
The reason this topography matters is because it varies the time in which you’re going to lose light. If you look up the time the sun sets, it’s not going to account for topography. It’s going to give you the time as if you were on flat land. Where I live, there are almost always mountains on the horizon so the time I was losing the sun was anywhere from 10-20 minutes before actual sunset. When I drove into the mountains to do my sessions this gap was even worse, sometimes I would lose the sun 3 hours before sunset!
The Solution
There are constantly questions from photographers in my local photographer Facebook page asking when they should start photographing in different spots. It seems like people are realizing the problem but they’re not sure where to find an answer. You can always start a session earlier and hope for the best but there’s a better way. There is a tool that not only knows the topography everywhere but it can also show you exactly WHERE and WHEN the sun will set!! Drum roll please……..it’s Google Earth!
Now let me explain how mind blowing this tool is. First off, you used to have to pay to use Google Earth some $400/year. This became a hinderance in its usability but as of 2015 Google released it for free! This makes this tool a no-brainer for photographers to use. I’ll show you how to do it!
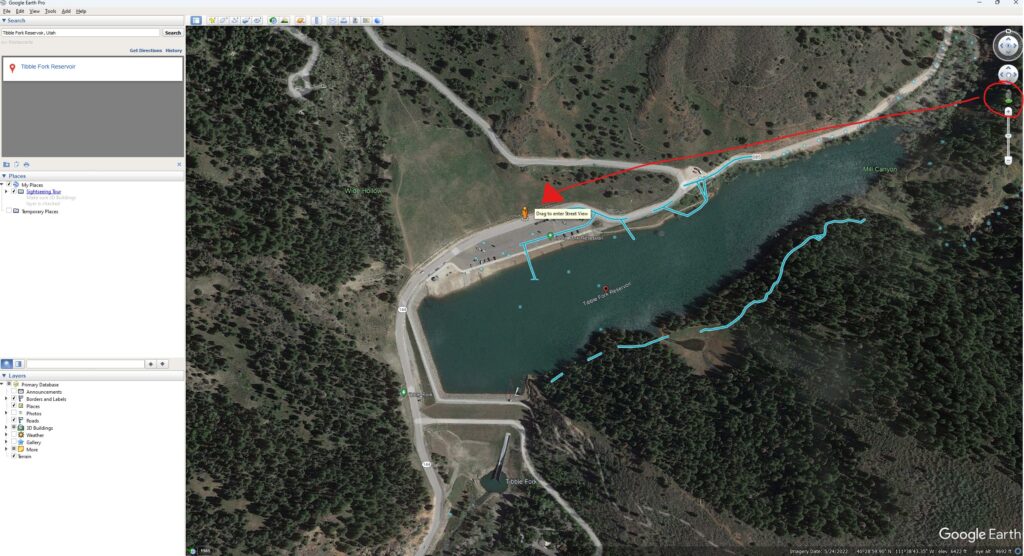
The first step is to download Google Earth Pro to your desktop. You need to download it instead of using the web version or you won’t get all the features. Once it’s downloaded, choose a location you’d like to photograph in. I’ll use an example of a location that’s popular to photograph in the mountains by my house.
The next step would be to drag the little guy by the top right corner of the screen to the approximate area you’d want to shoot in.
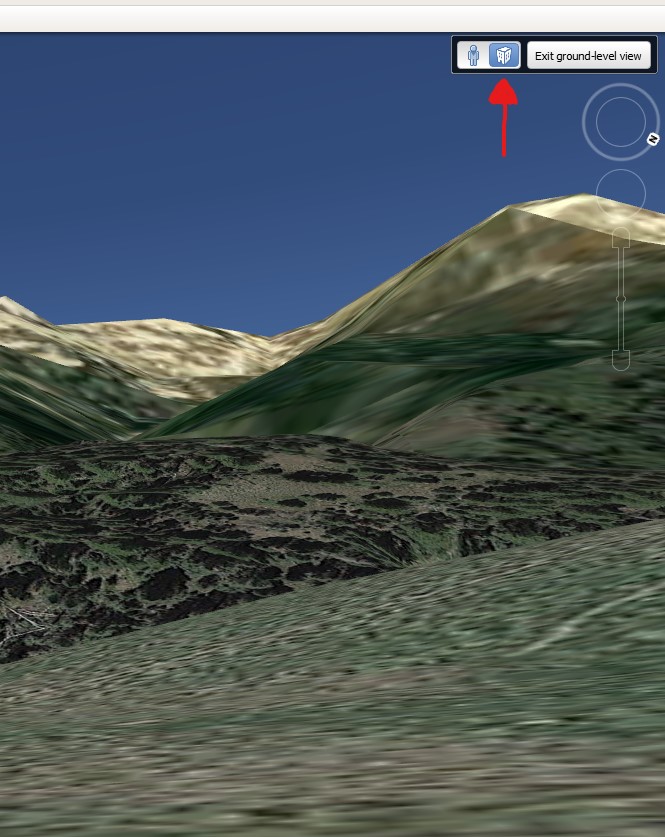
After he’s placed, make sure you’re in ground view. This will show you all the topography of the area you’re in.
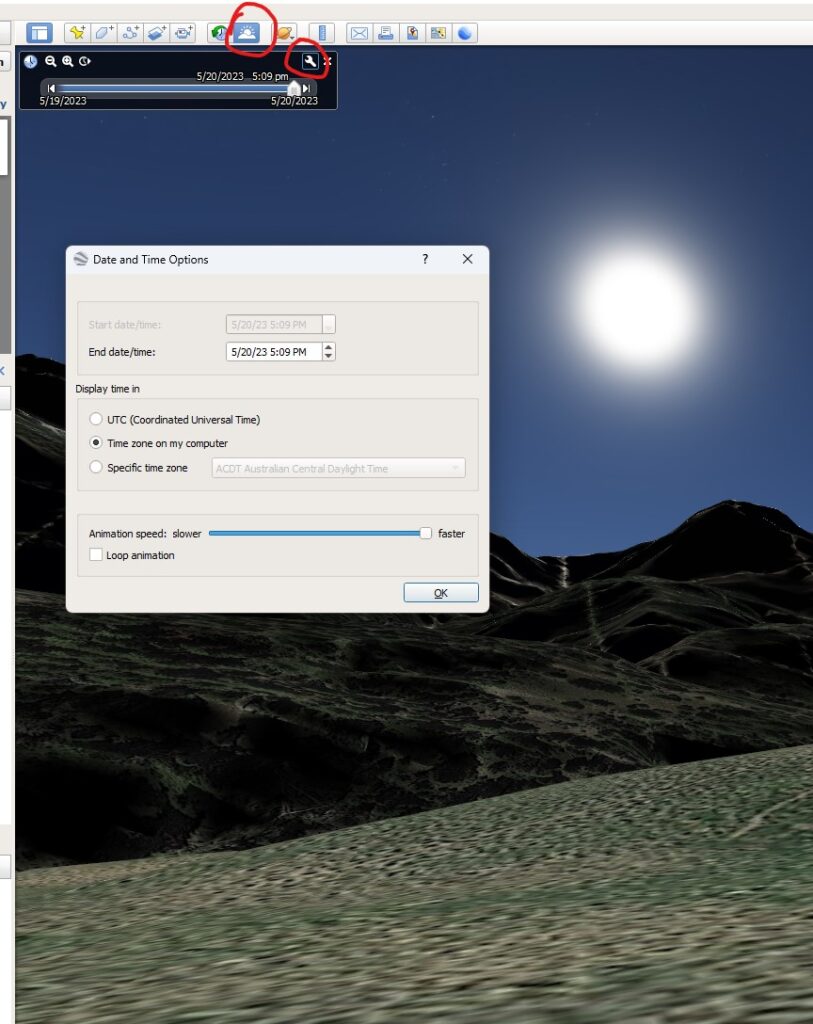
Now that you’re in ground view, click on the sun simulation tool. This will show you exactly when and where the sun will go down! Click the little sun and use the settings to change the date to the date of your session. (The simulation shows darker than it would appear in real life.) If your session is far enough away that it will be on a different time zone, make sure to update the ‘Display time in’ box to be the specific time zone that you’ll be in on the day of the session.
Final Thoughts
Through using this tool, you can truly find the best time to take photos in ANY location! I was able to find that for my session on May 20 the sun will be gone behind the mountains at 7:10pm. That’s a whole hour and a half sooner than the calculated sunset for that day at 8:40pm! There will still be some light out after 7:10pm that day, but it will start fading dramatically faster. If I started my session an hour before sunset at 7:40, or even at 7:10, there would be no way I could get all the shots I needed before the light ran out.
Not only can you find the exact time the sun goes down, but you can see exactly where too! This is extremely helpful to know what angles you should plan on when photographing an area. Generally, before the sun goes down, you’ll want the sun behind your subjects. This will give you an idea of the usable area you have.
Lastly, remember to check the weather before your session. It’s usually a good idea to start an hour or two earlier if it’s overcast and you don’t have as much available light.
I hope you found this helpful! Leave a comment if you thought this was valuable or if you have other tips for planning session times. If you’d like to see some of my family photography work, click here!
Leave a Reply Cancel reply
Copyright 2024 Jessica Gilbert Photography
@jessicagilbertphotos
family & newborn Photography in Utah County
(801) 540-5243
This is so great, Jessica. Thank you for sharing. I downloaded Google Earth Pro and followed your steps but can’t for the life of me find or generate the time slider. Do you know what I am missing? Many thanks.
I’m so glad this is helpful! In the last picture I posted I circled a little sun button. Are you able to see or click on that?
This is probably my new favorite tool! We live on an island and this is going to be a staple when I’m shooting at new venues! Thank you so much for sharing.
Oh perfect! I’m so glad it’s helpful!! 🙂 You’re so welcome.
Such a useful tool! Thank you for sharing!
So happy my post could help! 🙂
This is so helpful! I can’t wait to try it out for my next shoot! This will also be huge for wedding timeline prep too!
So glad it’s helpful! 🙂 I didn’t think about using it for weddings!
This is such a great article and so well-written! Thank you so much! Google Earth! Who knew?!
What a brilliant tip! Thank you for sharing it in such a helpful way!
So glad it was helpful, thanks for letting me know! 🙂
Hey Jessica, I also can’t find the time slider! Any help would be so appreciated!
In the option menu at the top click View and then check sun. Let me know if that helps!